
Having completed a couple of fixed gear tours I learned that there are a few simple things which will help you on your way to a successful trip.

Touring on a fixie in Belgium
The first thing is being used to pushing a fixed gear. I know it sounds obvious but you use slightly different muscles when you ride fixed. Your legs have to be strong enough to get started with the extra weight of your camping gear (you don’t quite as cool when you get beaten off the lights by a granny on a sit-up-and-beg). If you don’t ride fixed much your knees might start to struggle after a while. Andy and I were both noticing a bit of aching on our second tour and between us we probably ride hundreds of miles a week fixed. The other reason is that you have to be totally comfortable riding fixed. You will probably want to have your feet clipped-in in some way shape or form. I prefer using mtb clip in pedals to toe straps. Being double sided they make it easier when you have to clip in and out lots, they let you concentrate on the road and route rather than your feet. Note although proved possible by Andy, track stands whilst clipped in and loaded are pretty damn hard (and bloody scary). Unless like him you happen to be a track stand ninja you will probably be putting your feet down more than you’re used to. So in short you have to be able to cope with extra weight on the back and how it affects your balance.

Loaded track stands are pretty damn gnarly and not for the faint hearted
So the most obvious thing is route selection, if you only have one gear you have to make sure your route is reasonably flat. I would suggest that you pick the flattest route possible when your starting out, the extra weight and long distances will be challenge enough. Once you have completed a flattish fixie tour you will then be able to gauge how many hills you and your buddies (assuming you have some) can realistically handle. There are no hard and fast rules as so many factors affect this, what gear you’re pushing, how much weight your carrying, what the weather is doing, if your name is Chris Hoy etc etc. The only thing I would suggest it to pick nice quiet scenic back roads. It’s not pleasant to have to put your head down and blast 10 miles on a busy main road. It’s also against the idea of fixie touring, it’s not a race rather a nice cruise on a funny looking bike. Beautiful views and good company will help take your mind off the fact you only have one gear and your legs are totally spent. It generally makes the whole experience much more enjoyable. It’s worth noting here that fixed gear touring should be relaxed and fun. If you want to go crazy distances for months on end you’d be silly not to use gears (not that it wouldn’t be possible on a fixie). The way I treat fixed gear touring is a chilled out bizarre cycling adventure which is more about the ride than where I end up. I plan my routes accordingly making sure there is always lots of spare time to stop off at cafes. So take note of this advice and don’t take things to seriously and remember if the shit hits the fan you can always ride to the pub!

Looking out from the highest point on our ride
Tied to route selection is gear selection. The added weight will mean that unless you just cruise around on your fixie normally you will want change your rear cog (and maybe chainring). For example I normally ride 46 x 16 for the hilly country roads in Herefordshire (I used to use 48 x 16 round town) but touring I used 44 x 18. This is a topic which is pretty personal and I’m sure loads of people will suggest other gear ratios. I like to push an ‘easier’ gear round with a higher cadence. This puts less stress on your legs when you’re getting started and improves your endurance, prefect for touring.

Chainring selection is very important. I like to use mtb SPD pedals for touring
As well as hills there is another little gremlin which can play havoc with your tour, the darn wind. We got caught out with this in the flat Dutch landscape and also racing back to catch the boat. I would advise taking a selection of rear cogs. An extra couple of teeth on your rear cog will make far more difference then an extra couple of teeth up front. They weigh hardly anything and can be switched over pretty quick. I would recommend a couple reasonably close in size maybe two teeth different. For my set up I would take a 20t cog as well as the 18t. For them to be useful you have to make sure that you size your chain using the larger cog with the wheel set nearer the front. This will then mean that when you put the smaller cog on you can slide the wheel back and it will still be in the frame (which always helps!). Another thing to watch is that you have the right tool to unscrew your cog. When I get time I will post up a pic of the very neat little cassette removal tool I have that doesn’t require a chain whip for easy removal on tour.

How big is yours?
If you want to go further afield and over more adventurous terrain you might want to consider going singlespeed instead of fixed. Yeah I know this post is called fixed gear touring tips and fixed is hip right now but there is nothing wrong making your life easier so you can put in some killer miles over gnarly terrain. Yes I know you might have bought your fixie because it looks ‘cool’ but once you load it up with gear it never going to be that cool so I don’t think your street cred will be damaged any more by having a freewheel. I would probably consider this if for example I was doing Lands End to John O’Groats. You still have the challenge of one gear but your legs will be able to take a rest on the downhills, which will mean they last longer and also probably improve your overall speed.

Pick the right gear and everything will be good
So the next most important thing is packing and loading your bike. You have probably guessed the most important thing here……TRAVEL LIGHT! There is no easier way to discover your bags are too heavy than to carry them on a bike with one gear. After dong a fair bit of touring I am lucky to have amassed quite the collection of gear most of it pretty lightweight. Although my panniers look pretty big and heavy in the pictures they are actually packed with bulky lightweight stuff like sleeping bag, matt, tent and clothes. If you are worried about weight on your first tour and your only going for a couple of days you could always just pack your credit card and stay at a B&B or Motel and eat out (you also don’t have to spoil the look of your super cool bike by attaching silly bags to it, this may be the best choice if you’re a poser).

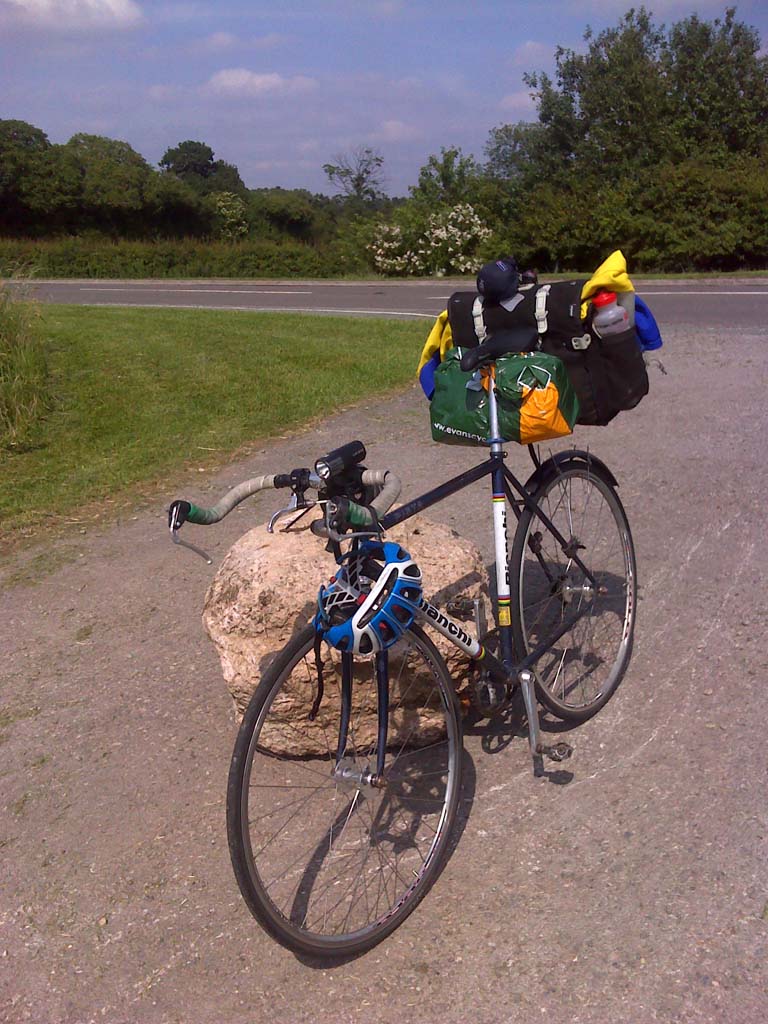
My setup for our first fixie tour
For our tours as I had the lightest camping gear I carried everything needed to camp out and the overall weight wasn’t bad at all. As I was carrying the tent and cooking stuff Andy filled up his extra space with food and supplies. TOP TIP: Its worth noting that for any tour if travelling with others you should split up the supplies and water evenly making sure the things your going to eat during the day are split evenly. Doing this means that everyone’s load gets reduced equally as you progress (this might stop people winging that they are carrying more weight than everyone else). If you ride with one of those really annoying uber fit racer types you may want to ignore this completely, in fact I recommend slipping a couple of rocks in their panniers when they go to take a leak, knock em down a peg or two.
Andy’s rather sketchy looking wobbly seat pack arrangement
Packing your gear is very important and this is one of thing which both me and Andy changed between tours and it made a significant difference. Unlike a normal bike you tend to want to ‘wobble’ a fixie from side to side to help put the power down when you’re getting going. If you try this with too much weight on the back then you will likely be eating a concrete sandwich or at the very least participating in some hilarious YouTube ready slow mo crashes. First you need to make sure that any panniers or bags on the back are securely fastened. For our first tour Andy didn’t have rack mounts so had most of his gear in a very wobbly seatpack attached to his seatpost. This not only looked pretty sketchy it also wobbled like crazy making his bike hard to control. TOP TIP: Panniers such as Ortlieb’s often come with different fixings to ensure a good fit on different sized racks. However even these aren’t good enough for me (especially when touring fixed) as they still rattle around and allow the panniers to move a bit. What I do is to wrap the contact points with duck tape or electrical tape, I like to get the fit tight enough that I have to push the bag on to the rack. This can be done with any panniers, granted it doesn’t look cool but it will stop the annoying rattles and make everything way more secure, you’ll thank me for it when you realise how much more peaceful your tour will be.

My rack taped up to prevent wobbling and rattling
For our fist tour as I have rack mounts I had all my gear in rear panniers. This meant I had to be careful not to over balance when starting. For the second tour I used a small frame bag to stash all my heavy items, tools stove food etc. This made a huge difference to my bikes handling and meant I used a lot less energy to get started. The bike handled much better as well, I could balance the bike with my weight easily and ride along no-handed (always a good measure of how a bike rides). Other options to consider would be a larger frame pack or a bar bag etc and also lashing your tent poles to your top tube, anything to help spread the weight and keep it centred. By the second tour Andy had changed bikes, he also went for an On-One, a Pompetamine essentially the same as my Pompino but allows the use of disc brakes. This is probably the best purpose-built fixer tourer I can think off. I am considering upgrading when I can find one of the earlier baby blue ones (so I can transfer all my pink and blue bits over). This also meant that he now had rack mounts so he sensibly decided to ditch the most sketchy looking saddle bag set up ever and carried his gear in panniers.
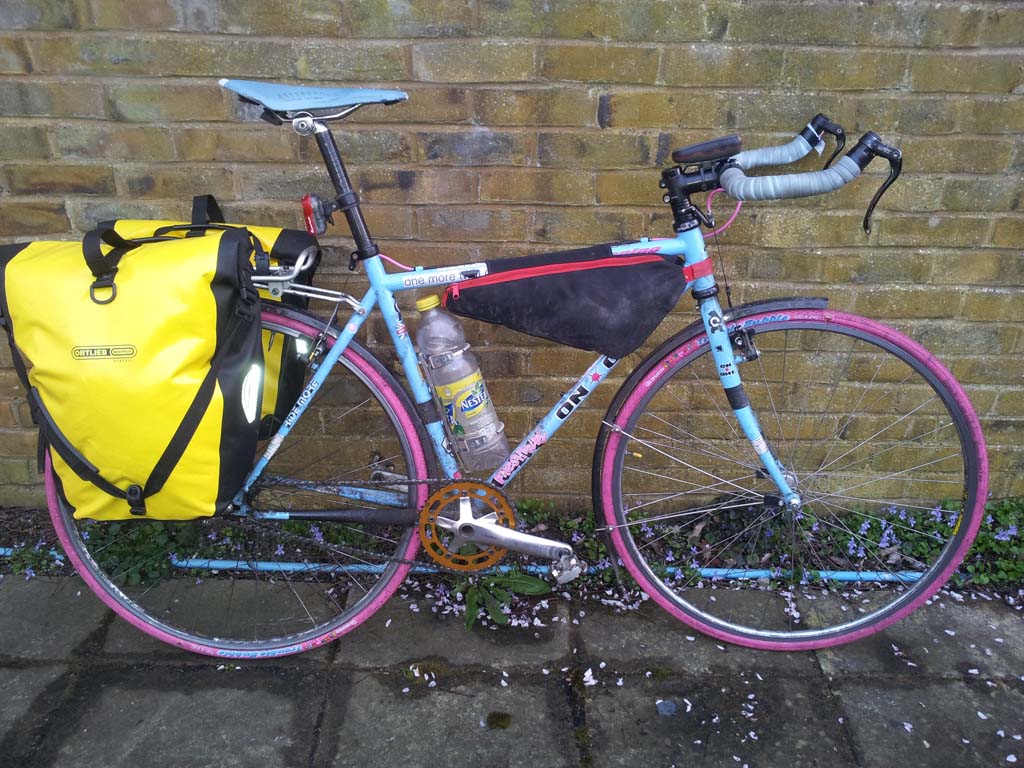
My fixie in lightweight touring mode
There are a couple of things to consider with the set-up of your bike. The first is the tyres, I understand if you are just doing a weekend tour you’re unlikely to want to change your tyres (I didn’t, although mostly because they are pink and sexy). The main reason I suggest this is that with extra weight on your bike you will feel any potholes in the road much more, but it’s not only you, your rims will also take more of a beating. As most fixed gear bikes aren’t built for carrying loads the chances are the rims are pretty feeble, larger tires say 28c will still roll well but will help soak up any impacts and protect your bike from damage.
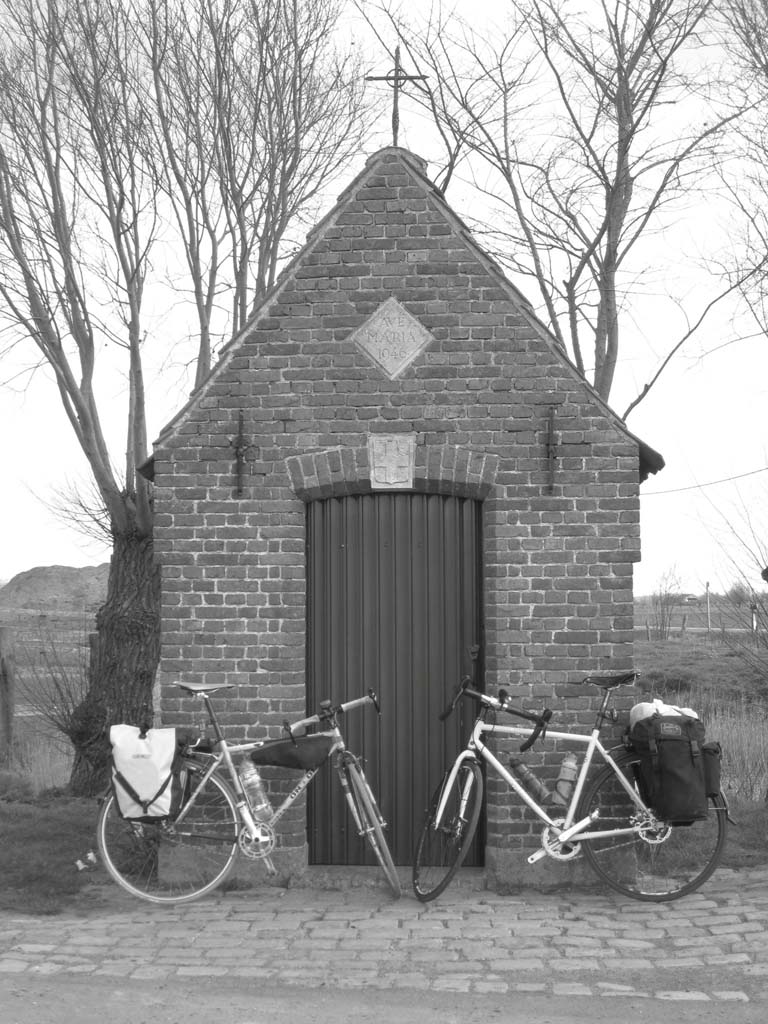
Photo opportunities are a good excuse to rest tired legs
The next thing to consider is mudguards (fenders for you American folks, i’m learning slowly). I have them on my bike all the time as I use my bike like a car and live in the countryside. I have discovered people don’t take cycling very seriously as a mode of transport if you turn up with a massive muddy line sprayed on your arse all the time. For our second tour Andy also had them which was lucky as the weather was pretty wet a times so it helped prevent our gear getting covered in crap. It’s not vital and if it’s the summer who cares but if you’re somewhere like the UK where the chance of rain is pretty much 100% then probably a wise choice. If you don’t have mounts you can get clip on ones like the SKS raceblades.

Regular tea breaks mandatory
There are a couple of disclaimers required here, check your toe overlap and rear wheel removal. We both now ride what is essentially a single speed cyclocross bike so the toe clearance is pretty good even with 172.5mm cranks. If your riding a track bike your toe clearance will be poor to start with so add some mudguards and I can pretty much guarantee certain death on the first decent bend. If like me you have a bike with sliding rear dropouts adding a rear mudguard can make rear wheel removal a nightmare. I have found that with my setup I can simply unscrew the two bolts holding the mudguard stays and there is enough room to wiggle the wheel out (let the air out your tire first). If this is a no go you can always cut your mudguard in half (approx level with the top of your tire) so you can still slide your wheel out. I did this on my Surly Troll, they don’t work quite as well but makes wheel removal a breeze.
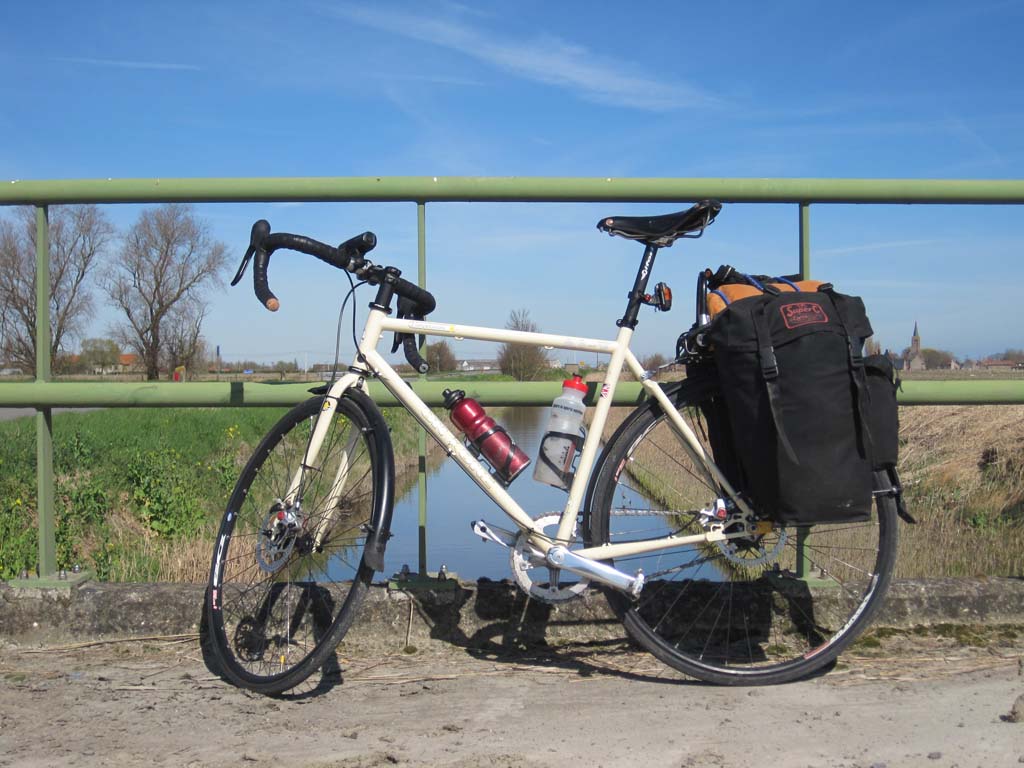
Andy’s On-One Pompetamine loaded up on tour
This brings us to a contentious one, I would recommend having a rear brake for fixed touring. I know people wanna be cool and skid lots and brakes are for sissies etc and this is ok if your riding round town. For the record I always have two brakes I generally don’t use the rear but it’s there in case. In certain situations arriving sideways with smoke coming off your rear tire might give the wrong impression. I like to ride long distances and I like to go fast, I really don’t think I would be able to live with myself if I went under a bus because I couldn’t stop fast enough (he he). Anyway stopping a loaded bike with your legs for a few days straight puts so much strain on your knees which really isn’t a good thing. There are lots of other reasons you might need to stop quickly on tour, you will likely be riding unfamiliar roads and making wrong turns etc (or even be on the ‘wrong’ side of the road like we were. The disc brakes on Andy’s bike are the best solution as you’re always guaranteed to stop no matter what the weather is doing and how much weight your carrying.

A relaxed riding style and chilled out mentality is the key to enjoying a fixed gear tour
So the only other thing I can think to mention is to consider your riding style. I have already mentioned using a rear brake to save your legs. This will be unusual for some who are not used to one. You have to try to get in to the habit of using your brake instead of your legs. You also have to remember to slow up sooner, turn less sharply and generally develop a more relaxed riding style. Trying to pin it off the line might be cool in the city but with added weight you legs will be knackered in no time. Another little thing to remember is that your likely be riding different roads, with much faster traffic than you get in town so make sure you are reasonably visible.
Hopefully these tips will help those already considering a fixed gear tour and maybe even convince some readers that touring on a fixie isn’t such a crazy idea after all. So go chuck some gear on that funny looking bike of yours, pick a sunny weekend and give it a go, I think you’ll be surprised just how fun a fixie touring adventure can be.


